I am delighted to share this DIY sensory bin made from a food container with you today. I’m focused on teaching Grace how to live a more sustainable lifestyle, and part of that is reusing household objects. We eat Cedar's Hommus almost daily; their mix of chickpeas, tahini and spices is seriously the perfect combination. We’ve tried so many brands, but Cedar’s is the only hommus Grace will eat. I’m convinced that it’s the tangy flavor that the others are missing! Keep reading for an easy DIY for your toddlers and to learn how I teach Grace about sustainability.


FAMILY TRADITIONS AND SUSTAINABILITY
When I was a younger, my grandparents taught me the art of reusing plastic containers for different purposes. This idea is two-fold. They taught me that repurposing an item and making it into something else is sustainable, but it meant more than just that. It was an opportunity for our family to spend time together. We would reuse food containers for various tasks. Peanut butter jars were paint brush holders for creating masterpieces, and cottage cheese bins were places to store our small doll accessories. We even planted sprout seeds in old milk cartons one spring.
I absolutely love that I can share traditions my family did with us with Grace. As a mom who cares very much about the environment, sustainability is even more important to me. Grace will grow up on this Earth, so it is a major goal of mine to teach her how to care for this space. We reuse ou Cedar's Hommus containers for various projects. For this specific one, I was able to draw on my experience as a Kindergarten teacher to make a DIY sensory bin from a reusable container. Like I mentioned, this sensory bin is great for sharpening fine motor skills, and even gives her a chance to work on letter identification and naming colors. It also gives us an activity to engage in together, which is exactly what my family and I did when I was a toddler.


DIY SENSORY BIN MADE FROM A FOOD CONTAINER
WHAT YOU NEED:
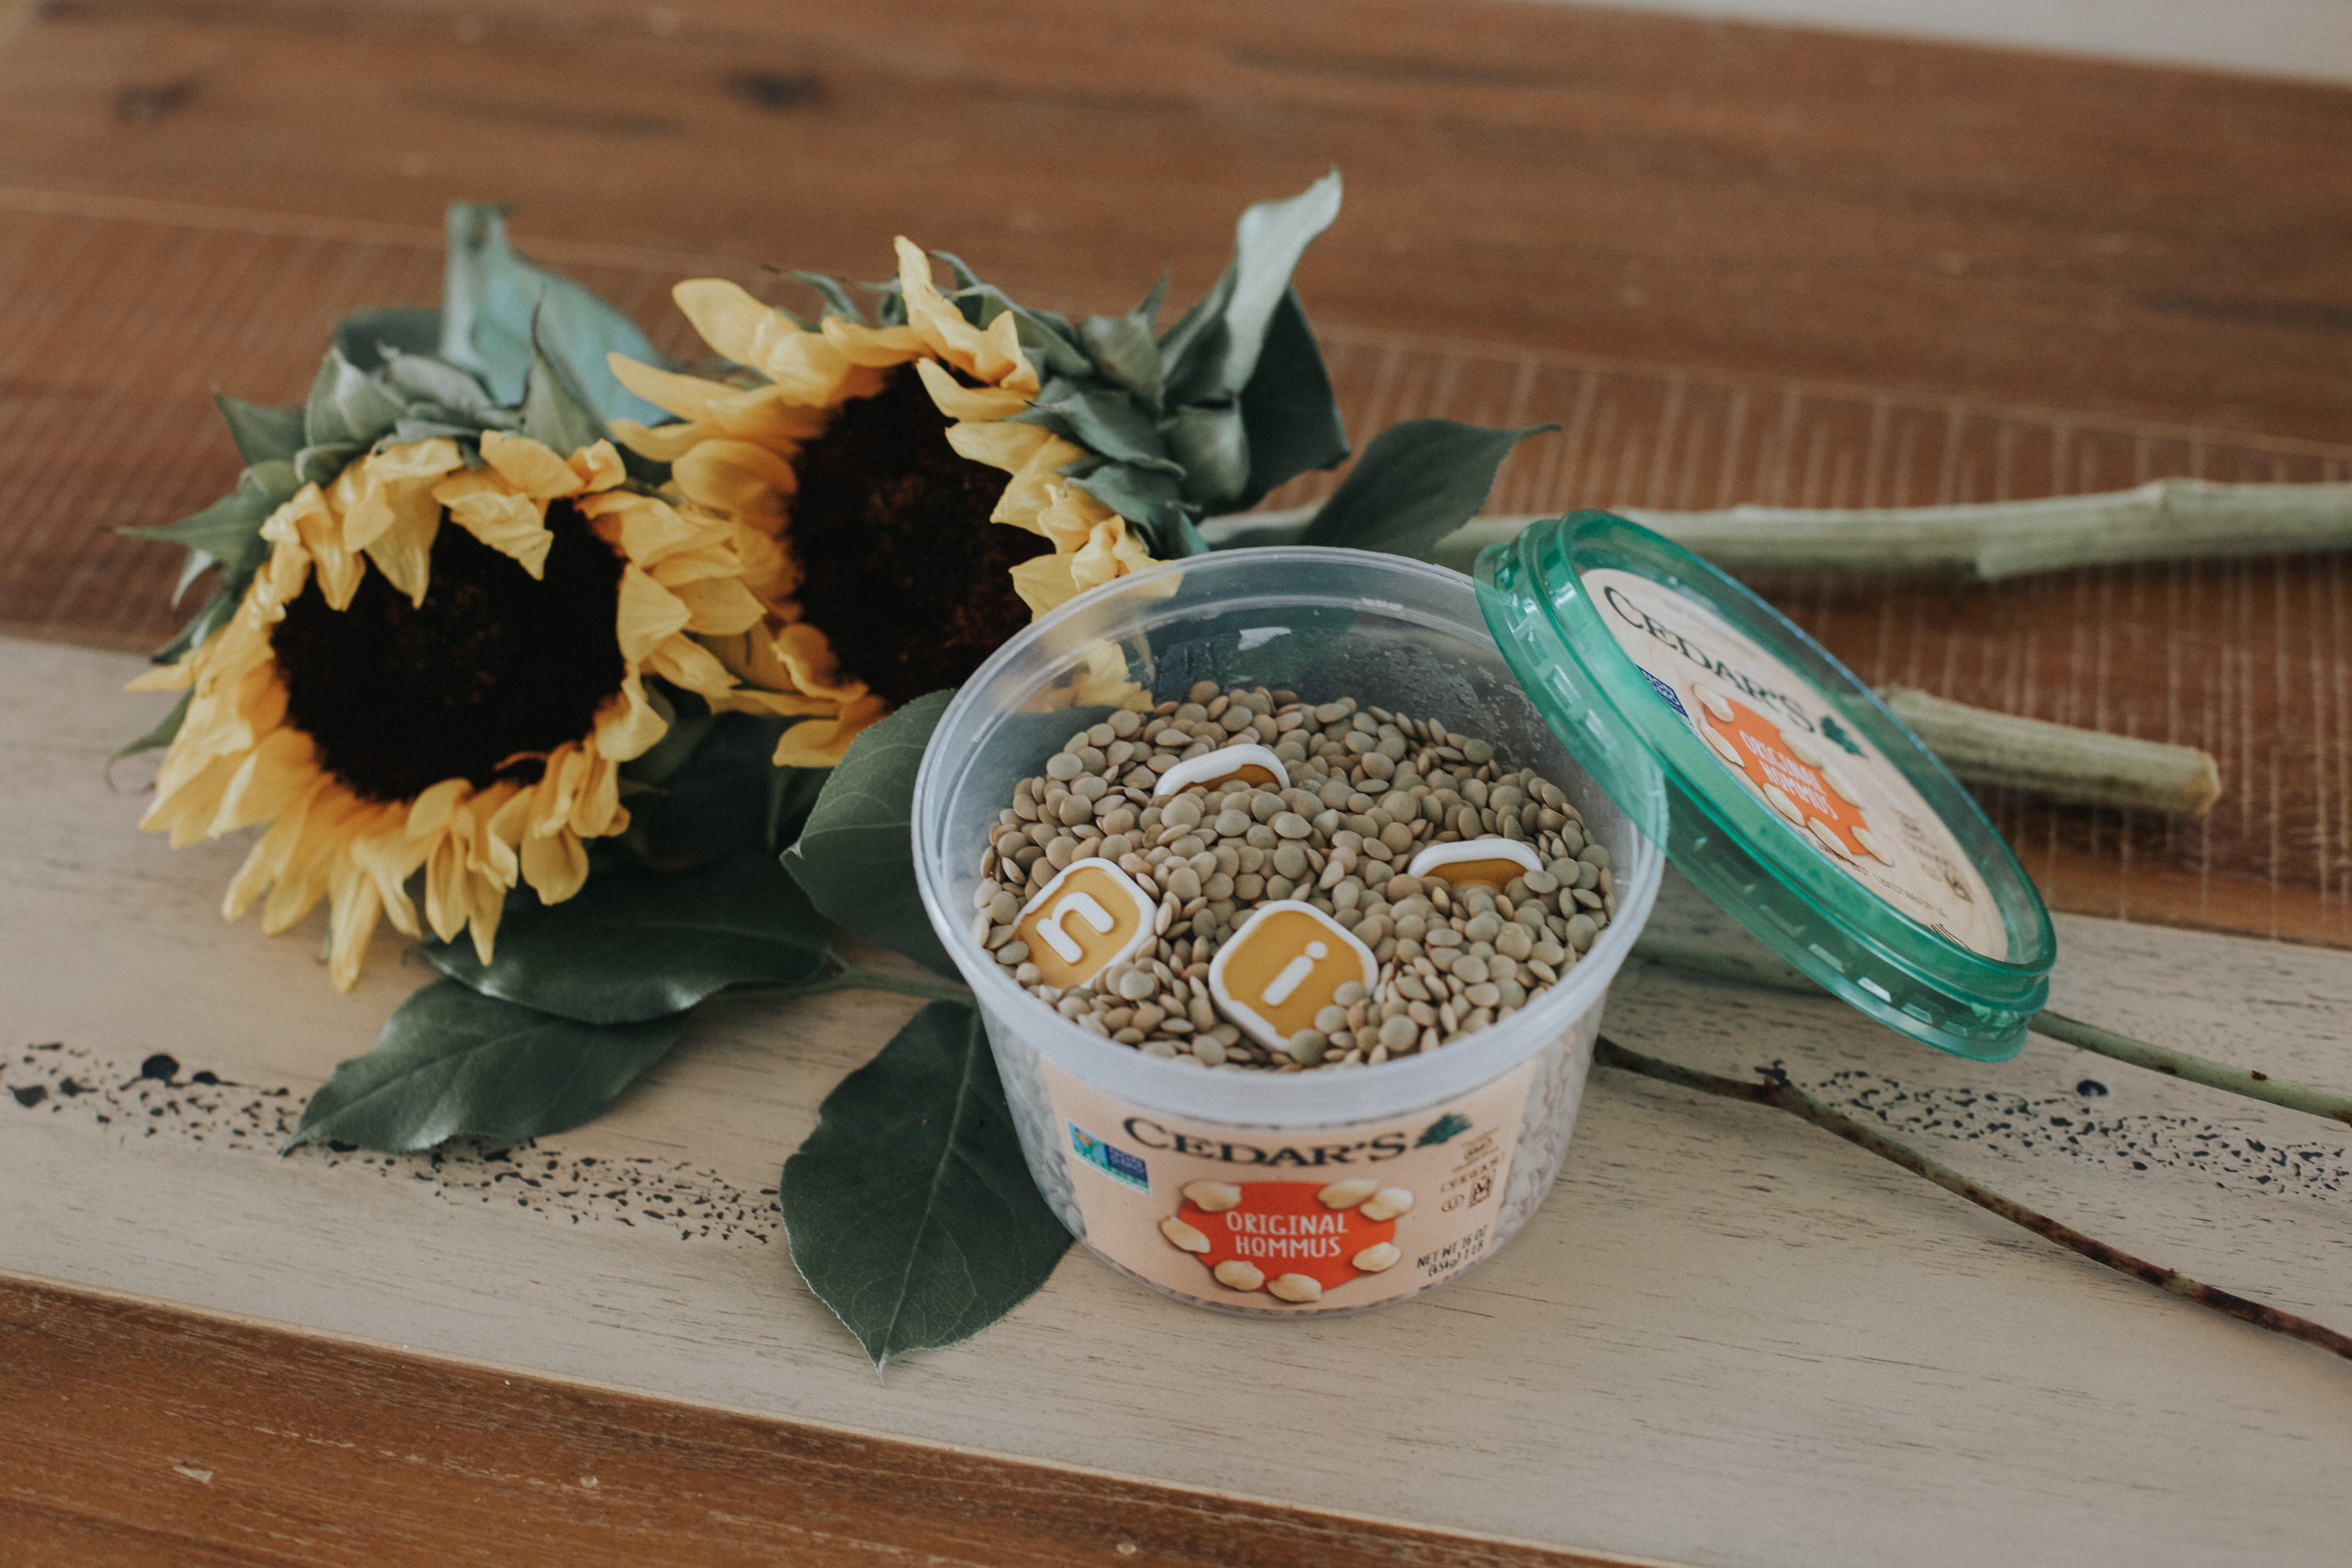
- One Cedar's Hommus container (or any food container with a lid)
- Dried, uncooked lentils (You can also use uncooked beans or rice. I just had these available so I used them)
- Letter tiles (these ones are from a Bananagrams game, but I’ve used Scrabble tiles for games like this too)
Optional: page to match color tiles to or page to match letter tiles to.
HOW TO ASSEMBLE:
This is probably one of the easiest projects you’ll ever complete. Simply fill the container with dried lentils about 3/4 full and then spread the letter tiles around so that your child has to “hunt” for them. If you want to scaffold – aka make more challenging – (sorry my nerdy teacher language is coming out, haha) then you can create a reusable page for your child to match the letters or colors to once they “fish” them out of the bucket.
HOW TO USE IT:
First and foremost, I want to say that if your child is at an age where they may put things in their mouth, you will definitely want to supervise them and play with them while using this. This is not the type of game you hand small children to keep them independently busy. With my Kindergartners, however, this kept them very busy on their own – it all depends on age, so please be aware.
To play this game, you simply take the lid off and teach your child to “fish” or “hunt” for the letters one by one. That part is true for all ages. Now, what happens next depends on where your child is at in their development.
For example, I wouldn’t ask an 18-month-old to tell me what letter they found; however, I can ask them to grab a letter from the bin. Which is pretty much all the game entails for a child that young, and that’s okay! Sensory practice is so important. You would be surprised what your kids learn by feeling different textures.
If your child is a toddler, (like between two and three) you can ask them another question once they find a tile. Like, “what color it is”, or “what letter did you find?”. If your child is school-aged, then I’d ask them both what letter they found, AND if they can think of a word that starts with that letter.
Lastly, if you really want to challenge your older kiddos, you can ask them to think of a three other words that start with that letter, or even to use that word in a sentence. The possibilities are endless, and you’re engaging with your child. It’s honestly a win-win.


I’m not sure if you can tell or not, but the teacher in me really came out when sharing this DIY sensory bin made from a reusable container. I love teaching little ones, and I love teaching Grace about my family, and how to take care of her planet.
For more inspiring ideas about motherhood, style, and wellness check out Larissa's blog here.